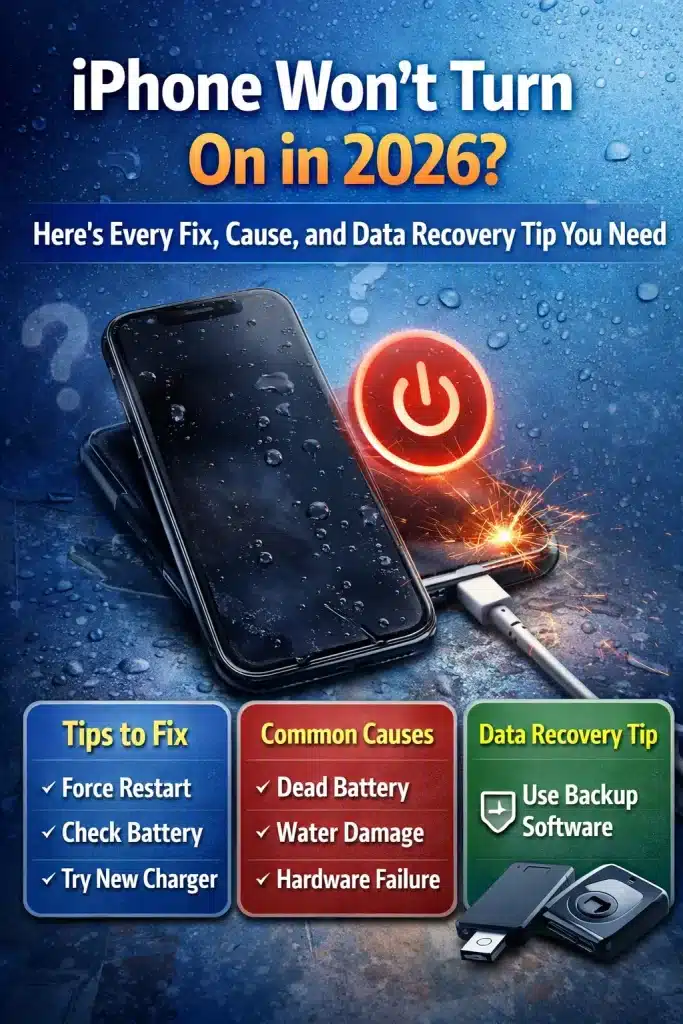
You press the power button. Nothing. You press it again, harder this time, and still, your iPhone screen stays black, and your iPhone won’t turn on. It’s a gut-punch moment, especially when your entire life lives inside that little glass rectangle.
Here’s the thing: you’re far from alone. According to a 2025 Asurion study, roughly 1 in 3 smartphone users have experienced a device that refused to power on at least once. And with over 1.2 billion active iPhones worldwide, that’s a staggering number of people hitting the same panic button you just did!
The good news? Most of the time, an iPhone that won’t turn on is totally fixable, and you might not even need to leave your house. In this guide, I’ll walk you through every possible cause, from a simple drained battery to deeper hardware failures. We’ll cover proven troubleshooting steps, model-specific quirks for everything from the iPhone 16 down to the iPhone 7, and, critically, how to recover your precious photos, messages, and data even when things look grim.
Let’s bring your iPhone back to life.
Why My iPhone won’t Turn On? Understanding the Most Common Causes
Before you start troubleshooting, it helps to understand what might be going on under the hood. An iPhone that won’t turn on isn’t always “dead”, sometimes it’s a software hiccup, sometimes it’s hardware, and sometimes it’s something embarrassingly simple. Here are the most common culprits.
Completely Drained or Degraded Battery
This is the number one reason iPhones refuse to power on. Lithium-ion batteries lose capacity over time. Apple says a typical iPhone battery retains about 80% of its original capacity after 500 complete charge cycles. But if your battery has degraded significantly, or if the phone sat unused for weeks, it can enter a deep discharge state where there’s not enough juice to even display the charging icon. If your iPhone battery has been draining fast lately, a dead battery is almost certainly your starting point.
Software Crash or Frozen iOS
A corrupted iOS update, a rogue app, or a system-level software crash can freeze your iPhone so completely that it appears dead. The screen goes black, the buttons don’t respond, and it looks like the phone has given up. But under that lifeless exterior, the processor might just be stuck in a loop. This is especially common after major iOS updates or jailbreak attempts.
Physical or Liquid Damage
Drops happen. So does water exposure, even on iPhones with IP68 water resistance ratings. A fall can dislodge internal flex cables or crack the display assembly without showing obvious external damage. Liquid can corrode logic board connections over time, sometimes causing failure days or weeks after the initial exposure. Check your SIM tray for the liquid contact indicator (LCI). If it’s turned red or pink, water has gotten inside. And if you’ve noticed signs you need professional back glass repair, internal damage from a drop could absolutely be the cause of your power issue.
Faulty Charging Cable, Adapter, or Port
Here’s one that catches people off guard: your iPhone might be fine, but it simply hasn’t been charging. Lint, dust, and pocket debris love to pack into Lightning and USB-C ports over time, creating an invisible barrier between your cable and the connector. A frayed cable or a low-wattage adapter can also fail silently. If your iPhone charging port isn’t working properly, your phone may have slowly drained to zero without you realizing it.
Overheating or Extreme Cold
iPhones have built-in thermal protection. If your device gets too hot, left on a car dashboard in summer, for instance, it will shut down to protect the battery and internal components. On the flip side, extreme cold (below about 32°F / 0°C) can cause temporary battery failure. The phone isn’t broken; it’s protecting itself. But it can be alarming when it refuses to turn back on until it reaches a safe temperature range.
Hardware Component Failure
When none of the simple explanations apply, you might be dealing with a hardware failure. Logic board issues, a failed power management IC, or a disconnected display cable can all result in an iPhone that won’t respond to anything. Here’s an important distinction: a black screen doesn’t always mean the phone is off. If the display assembly has failed but the phone is actually running, you might hear sounds or feel vibrations, a key clue we’ll explore in a later section. Similarly, if your iPhone touch screen isn’t working but the device seems to have power, the issue may be the display rather than the phone itself.
Step-by-Step Fixes When Your iPhone Won’t Turn On
Alright, now that we know what might be wrong, let’s work through the fixes in order, from the simplest to the most advanced. I’d estimate that about 80% of “iPhone won’t turn on” cases get resolved within the first three steps.
Step 1: Charge It (Properly) for at Least 30 Minutes
Grab a known-good cable and wall adapter, ideally an Apple original or MFi-certified accessory, and plug your iPhone in. If the battery is deeply drained, you might not see anything on screen for 5–15 minutes. That’s normal! After a few minutes, you should see either the charging icon (a battery outline with a lightning bolt) or the red empty battery icon. If you see the red battery icon, leave it charging for at least 30 minutes before attempting to turn it on. Don’t use a computer USB port for this; wall outlets deliver more consistent power.
Step 2: Force Restart Your iPhone
A force restart is different from a normal restart, it cuts power to the processor and forces a fresh boot, which can break through a software freeze. The button combination varies by model:
- iPhone 8, SE (2nd/3rd gen), X, XR, XS, 11, 12, 13, 14, 15, 16 and all Pro/Max variants: Quickly press and release Volume Up, then quickly press and release Volume Down, then press and hold the Side button until the Apple logo appears (about 10–15 seconds). Don’t let go when you see the “slide to power off” screen, keep holding.
- iPhone 7 / 7 Plus: Press and hold both the Volume Down button and the Sleep/Wake button simultaneously until the Apple logo appears.
- iPhone 6s and earlier: Press and hold both the Home button and the Sleep/Wake button simultaneously until the Apple logo appears.
Step 3: Inspect and Clean the Charging Port
Grab a flashlight and look inside your Lightning or USB-C port. See lint or gunk? Use a wooden or plastic toothpick (never metal!) to gently remove debris. A burst of compressed air can help, too. You’d be amazed how often this is the entire problem, the phone was never actually charging. For persistent charging port problems, professional cleaning or port replacement might be needed.
Step 4: Try a Different Power Source
Test with a different wall outlet, a different cable, and a different adapter. If you have a Qi-compatible wireless charger, try that too. The goal is to rule out every variable in the charging chain. If the phone charges wirelessly but not with a cable, you’ve identified a port problem. If it won’t charge at all, the issue is internal.
Step 5: Connect to a Computer
Plug your iPhone into a Mac or PC. Open Finder (macOS Catalina and later) or iTunes (Windows or older macOS). If the computer detects your iPhone, that’s great news; the phone has power even if the screen is black. From here, you can attempt a backup and restore. If the computer doesn’t recognize the device at all, we need to go deeper.
Step 6: Enter Recovery Mode
Recovery Mode forces your iPhone to connect to iTunes/Finder in a state where you can update or restore the software. Here’s how:
Connect your iPhone to a computer with a cable. Then perform the force restart sequence for your model (see Step 2 above), but don’t let go of the button(s) when the Apple logo appears. Keep holding until you see the Recovery Mode screen (a cable pointing toward a computer icon). Your computer should display a prompt to Update or Restore. Try updating first; this reinstalls iOS without erasing your data. If the update fails, you may need to choose Restore, which wipes the device.
Step 7: Enter DFU Mode (Last Resort)
DFU (Device Firmware Update) Mode is the deepest restore mode available. Unlike Recovery Mode, DFU doesn’t load the operating system at all, it communicates directly with the bootloader. This can fix issues that Recovery Mode can’t, including corrupted firmware. The process is model-specific and timing-sensitive, so follow Apple’s instructions carefully. Warning: DFU restore erases everything on the device. Make sure you’ve exhausted all other options and verified your backup situation before going this route.
iPhone Black Screen vs. iPhone Dead — How to Tell the Difference
This distinction matters more than you might think. A truly dead iPhone and an iPhone with a failed display require completely different solutions. Here’s how to figure out which one you’re dealing with.
Signs Your iPhone Is On, but the Screen Is Black
Put your ear close to the phone. Do you hear any sounds, a text notification chime, a vibration, or even a faint hum? Try pressing the volume buttons to see if you feel haptic feedback. If someone calls you, does the phone vibrate or ring? These are all signs that the phone is running, and the display itself has failed.
Test with Siri, Phone Calls, or Find My iPhone
Say “Hey Siri” (if you have it enabled). If Siri responds, your phone is very much alive, it’s the screen that’s the problem. You can also try calling your iPhone from another phone or checking its location on Find My iPhone (via iCloud.com or another Apple device). If it shows as online and at your location, the phone is powered on. This kind of touch screen or display issue is a hardware repair, not a power problem.
Display Failure vs. Logic Board Failure
If your phone shows zero signs of life, no sounds, no vibrations, no response from Siri, doesn’t show up in Find My, and it doesn’t respond to charging or force restart attempts, you’re likely looking at a logic board issue or a completely dead battery. A display-only failure is actually the better scenario because it’s a cheaper and simpler repair.
The Boot Loop Problem
Sometimes the iPhone isn’t fully dead or fully alive; it’s stuck in a boot loop. You’ll see the Apple logo appear, the screen goes black, the logo comes back, and the cycle repeats endlessly. Boot loops are usually caused by failed software updates, corrupted system files, or incompatible tweaks (especially on jailbroken devices). Recovery Mode or DFU Mode (covered above) is typically the fix.
Model-Specific Troubleshooting: iPhone 16, 15, 14, SE, and Older Models
Not all iPhones are created equal, and some models have unique quirks when it comes to power issues. Here’s what to know for your specific device.
iPhone 16 / 16 Pro
The iPhone 16 lineup uses USB-C exclusively, and not all USB-C cables are equal. Make sure you’re using a cable that supports charging (some USB-C cables are data-only). There have also been scattered reports of iOS 19 beta builds causing freezes that mimic a dead phone, if you’re on a beta, a force restart followed by a stable software restore may be needed.
iPhone 15 / 15 Pro
The first-generation USB-C iPhones occasionally had firmware-related issues around USB-C power negotiation. Apple issued service bulletins for certain units. If your iPhone 15 won’t turn on and it’s within warranty, this is worth flagging at the Genius Bar.
iPhone 14 Series
The iPhone 14 introduced satellite SOS, which runs background processes that some users found contributed to unexpected battery drain. If your iPhone 14 died and won’t turn back on, a deeply drained battery from background satellite connectivity is a possibility. Check out our deep dive on why your iPhone battery drains fast for more on this.
iPhone SE (3rd Gen)
The SE’s smaller battery makes it more vulnerable to deep discharge than the Pro models. If you leave it unused for even a week or two, it can drain to a point where it takes an extended charging session (sometimes 45+ minutes) before it shows any signs of life. Be patient with this one.
Older Models (iPhone 11, XR, X, 8, 7)
If you’re rocking an older model, battery degradation is the most likely suspect. An iPhone 7 or 8 that’s been in use since launch has gone through thousands of charge cycles, and its battery capacity may be well below 50% of its original. At that point, the battery may not hold enough charge to boot the device. A battery replacement (around $49–$89 through Apple) can often bring these older phones back to life.
Data Recovery Tips When Your iPhone Won’t Turn On
This is the section most people are really here for. Even if your iPhone is toast, your data probably isn’t. Let me walk you through your options.
Option 1: Recover from iCloud Backup
If you had iCloud Backup enabled (and most people do, even if they don’t remember turning it on), your photos, contacts, messages, app data, and settings are likely sitting safely in the cloud. Here’s how to check:
Go to iCloud.com from any browser and sign in with your Apple ID. Click on your account settings to see your devices and the date of the last backup. If there’s a recent backup, you can restore it to a new or repaired iPhone during the initial setup process. You can also access your photos, contacts, notes, and documents directly from iCloud.com without restoring to a device.
Option 2: Recover from iTunes/Finder Backup
If you ever synced your iPhone to a Mac or PC, there may be a local backup stored on that computer. Open Finder or iTunes and look for your device in the backup list. Local backups are especially valuable because they can include Health data, keychain passwords, and Wi-Fi settings if you choose the “Encrypt local backup” option. You’ll need the backup password to restore encrypted backups, so hopefully you remember it!
Option 3: Third-Party iPhone Data Recovery Software
When your phone won’t turn on, and you don’t have a backup, third-party recovery tools can sometimes extract data directly from the device or from partial backups. Popular options include Dr.Fone by Wondershare, iMobie PhoneRescue, and Tenorshare UltData. These tools work by communicating with your iPhone in Recovery or DFU mode to pull data off the storage chip.
A word of caution: results vary widely. These tools work best when the phone can at least enter DFU mode. If the logic board is completely fried, software-based recovery won’t help. Also, be wary of scammy “free” tools, stick to established, well-reviewed options, and expect to pay $50–$80 for a license.
Option 4: Professional Data Recovery Services
For truly dire situations, logic board failure, water damage, or physical destruction, professional data recovery labs can perform board-level repairs or chip-off recovery to extract your data. This involves physically removing the NAND storage chip and reading it with specialized equipment. It’s not cheap (expect $300–$1,500+ depending on the complexity), but if irreplaceable photos or documents are at stake, it can be worth every penny.
Prevention: Set Up Backups Now
I know this doesn’t help if you’re already in crisis mode, but for anyone reading this whose iPhone is currently working: go set up automatic iCloud backups right now. Go to Settings > [Your Name] > iCloud > iCloud Backup, and make sure it’s toggled on. Also, consider running a local encrypted backup to your computer once a month. Five minutes of setup today can save you thousands of dollars and immeasurable heartbreak down the road.
When to Visit the Apple Store or an Authorized Repair Center
Sometimes DIY isn’t going to cut it. Here’s how to know when it’s time to call in the professionals, and what to expect when you do.
Signs It’s Beyond DIY Repair
If your iPhone doesn’t respond to any of the steps above, no response to charging, force restart, Recovery Mode, or DFU Mode, it’s time for professional help. Other red flags include a visibly swollen battery (the screen or back glass is bulging), burn marks or a chemical smell near the charging port, or any situation where you suspect internal water damage.
Physical damage like cracked back glass can also indicate deeper internal problems. If you’re noticing signs you need professional back glass repair, it’s worth having a technician check for internal damage at the same time.
Apple Warranty and AppleCare+ Coverage
Standard Apple warranty covers manufacturing defects for one year from purchase. AppleCare+ extends this to two years (or longer with newer plans) and adds coverage for up to two incidents of accidental damage per year, but you’ll pay a deductible ($29 for screen damage, $99 for other damage). Important: Liquid damage and unauthorized third-party repairs can void your warranty, so check your coverage status at checkcoverage.apple.com before opening up your phone or taking it to an independent shop.
Cost Estimates for Common iPhone Repairs
Without AppleCare+, here’s roughly what you’re looking at in 2026: battery replacement runs $49–$99, depending on the model. Screen replacement ranges from $129 (SE) to $379 (16 Pro Max). Logic board repair or full device replacement can cost $299–$599 or more. These are Apple’s official prices; independent repair shops may charge less, but the quality and warranty coverage vary.
Apple Store vs. Authorized Provider vs. Independent Shop
Apple Stores and Apple Authorized Service Providers (AASPs) use genuine Apple parts, and their repairs are covered by Apple’s warranty. Independent shops are often cheaper and faster, but parts quality can be inconsistent and the repair may void your Apple warranty. For newer phones still under warranty or AppleCare+, stick with Apple or an AASP. For older phones out of warranty, an independent shop can be a cost-effective choice.
Booking a Genius Bar Appointment
Go to getsupport.apple.com or use the Apple Support app to schedule an appointment. Walk-ins are possible, but waits can be long. Bring your iPhone, your charging cable, proof of purchase if you have it, and your Apple ID credentials. Back up your data before the appointment if possible, Apple may need to erase your device during the repair process.
How to Prevent Your iPhone From Not Turning On Again
Once you’ve survived the scare of a dead iPhone, you’ll want to make sure it doesn’t happen again. Here’s how to keep your device healthy for the long haul.
Manage Your Battery Health
Enable Optimized Battery Charging in Settings > Battery > Battery Health & Charging. This feature learns your daily charging routine and waits to finish charging past 80% until right before you need it, which reduces battery wear. Avoid letting your battery regularly drop to 0%, and try to keep it between 20% and 80% most of the time. These habits can significantly extend your battery’s lifespan.
Keep iOS Updated
Apple regularly releases updates that fix bugs causing crashes, freezes, and unexpected shutdowns. Keeping your software current is one of the easiest ways to prevent software-related power issues. Just make sure to back up before updating, in the rare event an update goes wrong, you’ll be glad you did.
Use MFi-Certified Accessories
Cheap knockoff cables and chargers can deliver inconsistent power, damage your charging port, or even harm the battery. Look for the “Made for iPhone” (MFi) certification logo on accessories. Yes, they cost more. But a $15 certified cable is a lot cheaper than a $99 battery replacement or a charging port repair.
Protect Against Physical and Water Damage
A quality case is your first line of defense against drops, and a tempered glass screen protector can prevent the kind of impact damage that dislodges internal components. Even though modern iPhones have water resistance, don’t push it, avoid submerging your phone intentionally, dry the charging port before plugging in after water exposure, and never charge a wet iPhone.
Monitor Battery Health and Replace When Needed
Check your battery health regularly at Settings > Battery > Battery Health & Charging. When maximum capacity drops below 80%, or when the device shows a “Service” recommendation, it’s time for a replacement. Don’t wait until the battery fails; proactive replacement is cheaper and prevents the exact scenario you’re reading this article about.
iPhone Won’t Turn On After Update, Drop, or Water Damage — Specific Scenarios
Different situations call for different approaches. Here’s targeted advice based on what happened right before your iPhone died.
After an iOS Update
A failed or interrupted update is one of the most common causes of an iPhone that suddenly won’t turn on. Start with a force restart. If that doesn’t work, put the phone into Recovery Mode and select “Update” (not Restore) to reinstall iOS without erasing your data. If the update was a beta release, you may be able to downgrade to the last stable version through DFU mode, though this will erase the device.
After a Drop
Even if the screen looks fine externally, a hard drop can dislodge internal connectors, especially the display and battery flex cables. If your iPhone won’t turn on after a drop, try the force restart first. If nothing happens, the issue is likely a loose or damaged connector that requires professional repair. Don’t overlook visible cracks or damage to the back glass, either; back glass damage can be a sign of significant impact force that affected internal components.
After Water Exposure
First, do NOT put your iPhone in rice. Seriously. This is one of the most persistent tech myths out there, and it doesn’t work. Rice dust can actually make things worse by clogging ports and speakers. Instead: power off the phone immediately (if it’s still on), shake out excess water gently, and place it in a dry, well-ventilated area for at least 48 hours. Do not attempt to charge it until it’s completely dry. If the phone won’t turn on after drying, you’re looking at a professional repair situation; corrosion on the logic board may need to be cleaned at a component level.
After Overnight Charging
If your iPhone was plugged in all night and you woke up to a dead screen, the charger or cable may have failed during the night, or the adapter may have overheated and shut down. Less commonly, a swollen battery can trip the internal safety disconnect. Try a different charger and cable first. If the phone still won’t respond, feel the back of the phone and the area around the battery, if it feels warm or you see any swelling, stop using it immediately and take it to a repair center. Swollen batteries are a safety hazard.
After Long Storage or Inactivity
An iPhone that’s been sitting in a drawer for months is almost certainly deeply discharged. Connect it to a wall charger (not a computer) and wait. It may take 15–30 minutes before the screen shows any sign of life, and sometimes up to an hour for a phone that’s been stored for a very long time. If it still doesn’t respond after an hour of charging, the battery may have degraded beyond recovery and will need replacement.
Frequently Asked Questions About iPhone Not Turning On
Why is my iPhone not turning on even when it’s charged?
If your iPhone won’t turn on even after charging for 30+ minutes, the issue is likely not the battery level. It could be a software freeze (try a force restart), a faulty charging cable that wasn’t actually delivering power, a damaged charging port, or a hardware failure. Work through the step-by-step fixes above to isolate the problem.
Can I fix an iPhone that won’t turn on without a computer?
Yes, in many cases! The most common fixes, charging, force restarting, and cleaning the charging port, don’t require a computer. However, if those don’t work, you’ll need a computer for Recovery Mode and DFU Mode restores.
How long should I charge a completely dead iPhone before it turns on?
Give it at least 15–30 minutes with a wall charger before expecting any response. For deeply discharged batteries (phone unused for weeks), it can take up to an hour. If you see no charging indicator at all after 30 minutes with a known-good cable, the problem is likely something other than battery level.
Will I lose all my data if my iPhone won’t turn on?
Not necessarily! If you have an iCloud or iTunes backup, your data is safe and can be restored to any iPhone. Even without a backup, professional data recovery services can often extract data from non-functional devices. The key is not to attempt a factory restore unless you’re sure you have a backup or have exhausted recovery options.
Is it worth repairing an old iPhone that won’t turn on?
It depends on the repair cost versus the phone’s value. A $49 battery replacement on an iPhone 11 is almost always worth it. A $500 logic board repair on the same phone probably isn’t. Consider the phone’s current resale value and whether it still receives iOS updates when making your decision.
What does it mean when my iPhone shows a red battery icon and then goes black?
The red battery icon means the battery is critically low, but the phone is capable of powering on, it just needs more charge. Plug it in and wait at least 15–30 minutes. If the icon appears but the phone never progresses past it, the battery may be too degraded to hold a charge and needs replacement.
Final Thoughts: Don’t Panic, Your iPhone (and Your Data) Can Almost Always Be Saved
An iPhone that won’t turn on can feel like a catastrophe, but in most cases, it’s a problem with a clear solution. Whether it’s a simple force restart, a deeply drained battery that just needs patience, or a trip to the Apple Store for professional repair, you now have the complete playbook to handle it.
The most important takeaway? Don’t panic, and don’t assume your data is gone. iCloud backups, local backups, and professional recovery services mean your photos, contacts, and messages are almost always retrievable, even from a seemingly dead device.
Start with the basics: charge, force restart, check your cables. If that doesn’t work, escalate to Recovery Mode or DFU Mode. And if all else fails, the pros can take it from there.
Have you dealt with an iPhone that refused to power on? I’d love to hear what worked for you. Drop a comment below or share this guide with someone who’s staring at a black screen right now. And if you haven’t already, go check your iCloud backup status. Seriously. Do it now. Future you will be grateful!