Quick Answer: A cracked iPad screen can be repaired by replacing the digitizer glass, the LCD, or the full fused screen assembly, depending on your iPad model and the type of damage. Professional repairs cost $80–$350 and take 30–90 minutes. DIY repairs cost $30–$100 in parts but take 1–2 hours and carry risk of additional damage, especially on newer fused-display iPads.
Did you know that nearly 50% of tablet owners have experienced a cracked or damaged screen at some point? If you’re staring at a spiderweb of cracks on your iPad right now, don’t panic, you’re not alone, and you’ve got options!
I’ve been repairing iPads for years, and let me tell you, a broken screen doesn’t have to mean a broken budget. Whether you dropped it off the couch (we’ve all been there) or your toddler launched it across the room like a frisbee, this comprehensive iPad screen repair guide will walk you through everything you need to know.
This guide walks you through everything you need to know: how to diagnose what’s actually broken, what the repair costs, whether you should DIY or go pro, and step-by-step instructions if you want to tackle it yourself.
How to Diagnose Your iPad Screen Damage
Before you decide how to fix your broken iPad screen, you need to understand what’s actually broken. iPad screens have multiple layers, and the type of damage determines your repair path and cost.
The Three Layers of an iPad Screen
- Front glass / digitizer: The outermost layer you touch. It detects your finger input. If this is cracked but the image underneath looks fine, you have digitizer-only damage—the cheapest fix.
- LCD display (or OLED on iPad Pro): The layer that produces the image. If you see black spots, colored lines, bleeding, or a completely blank screen, the LCD is damaged. This costs more to repair.
- Fused assembly: On most modern iPads (all iPad Air, iPad Pro, iPad 10th gen), the glass and LCD are bonded together. Even if only the glass is cracked, you must replace the entire fused assembly.
Quick Diagnostic Checklist
| What You See | What’s Broken | Repair Needed |
| Cracks in glass, display looks normal | Digitizer only | Glass replacement (non-fused) or full assembly (fused) |
| Cracks + touch doesn’t respond in some areas | Digitizer damaged | Glass or full assembly replacement |
| Black spots, ink-like blotches, colored lines | LCD damage | Full assembly replacement |
| Screen completely black but iPad still makes sounds | LCD or cable disconnected | Full assembly or cable repair |
| Display flickers or has white/green tint | LCD + possible cable damage | Full assembly + diagnostics |
| Spider cracks + bent frame | Glass + frame damage | Full assembly + frame repair |
Fused vs. Non-Fused iPad Displays: Why It Matters for Repair
This is the single most important thing to understand before repairing your iPad screen. Whether your iPad has a fused or non-fused display changes everything—cost, difficulty, and repair method.
| Non-Fused Display | Fused (Laminated) Display | |
| iPad Models | iPad 4 and earlier, iPad 7th–9th gen | iPad 10th gen, all iPad Air, all iPad Pro, iPad Mini 4+ |
| Can replace glass only? | Yes — cheapest repair option | No — must replace full assembly |
| DIY parts cost | $20–$40 (glass only) | $60–$200+ (full assembly) |
| Professional repair cost | $80–$150 | $150–$350+ |
| DIY difficulty | Moderate — beginner-friendly | Hard — experience recommended |
| Risk of further damage | Lower | Higher (LCD can crack during removal) |
How Much Does iPad Screen Replacement Cost?
iPad screen replacement costs vary widely depending on your model, whether you go DIY or professional, and whether your display is fused or non-fused. Here’s a quick overview:
| iPad Model | DIY Cost | Local Shop | Apple | Detailed Guide |
| iPad 7th–9th gen | $25–$45 | $80–$130 | $249 | → See cost guide |
| iPad 10th gen | $70–$100 | $130–$180 | $309 | →See cost guide |
| iPad Air (all gen) | $60–$120 | $130–$220 | $309–$379 | → iPad Air cost guide |
| iPad Mini (all gen) | $50–$90 | $100–$180 | $249–$379 | → iPad Mini cost guide |
| iPad Pro 11″ | $90–$160 | $180–$280 | $379 | → iPad Pro cost guide |
| iPad Pro 12.9″ | $120–$200 | $220–$350 | $499–$599 | → iPad Pro cost guide |
*Prices are estimates and vary by location and parts quality. For model-specific breakdowns with Apple vs. local vs. DIY comparisons, see the linked cost guides above.
iPad Screen Repair Difficulty by Model
| Model | Display | Difficulty | Time (Pro) | DIY? | Key Risk |
| iPad 7th–9th gen | Non-fused LCD | Moderate | 30–45 min | Yes | Digitizer cables |
| iPad 10th gen | Fused LCD | Moderate+ | 45–60 min | Risky | LCD during removal |
| iPad Air 4th/5th | Fused LCD | Hard | 45–70 min | Risky | Thin body, tight cables |
| iPad Mini 4/5/6 | Fused LCD | Hard | 40–60 min | Not rec. | Tiny size, tight tolerance |
| iPad Pro 11″ | Fused OLED | Expert | 60–90 min | No | Face ID, ProMotion display |
| iPad Pro 12.9″ | Fused Liquid Retina | Expert | 60–90 min | No | Face ID, size, $$ parts |
Essential Tools and Parts for iPad Screen Repair
Having the right tools isn’t just helpful, it’s the difference between a successful repair and a catastrophe. Trust me, I’ve seen people try to pry an iPad open with a butter knife. Don’t be that person.
Your Complete Tool Checklist
Here’s what you need:
- Heat gun or iOpener (heated bag): Essential for softening the adhesive that holds the screen in place. A hair dryer works in a pinch but offers less control.
- Suction cups: Heavy-duty suction cups give you the leverage to lift the screen once the adhesive is softened. Look for ones with handles or loops.
- Plastic pry picks and spudgers: These thin, flexible tools slide between the screen and frame to separate the adhesive. Never use metal tools; they’ll scratch the frame and potentially damage internal components.
- Pentalobe and Phillips screwdrivers: iPads use tiny pentalobe screws in certain areas. A precision screwdriver set designed for electronics is a must.
- Tweezers: Anti-static, ESD-safe tweezers for handling tiny screws, brackets, and ribbon cables.
- Replacement adhesive strips: Pre-cut adhesive strips designed for your specific iPad model make resealing clean and professional.
- Microfiber cloth and isopropyl alcohol (90%+): For cleaning adhesive residue and dust before installing the new screen.
How to Repair Your iPad Screen: Step-by-Step iPad Screen Replacement (Overview)
Alright, this is the main event. Follow these steps carefully, take your time, and resist the urge to rush. I’ve repaired hundreds of iPad screens, and patience is the single biggest predictor of success.
Important: Before you begin, back up your iPad completely via iCloud or your computer. While a screen replacement shouldn’t affect your data, it’s always smart to prepare for the unexpected.
Step 1: Power Down & Prepare (2 min)
Shut down the iPad completely. Lay it face-down on a soft, clean surface. Organize tools and replacement parts within arm’s reach. A magnetic project mat helps keep track of tiny screws.
Step 2: Heat the Edges to Soften Adhesive (5–10 min)
Apply heat along the screen edges using a heat gun or iOpener for 2–3 minutes per edge. Keep the heat gun 3–4 inches from the surface and keep it moving. Start with the edge furthest from the cameras or home button to avoid ribbon cables.
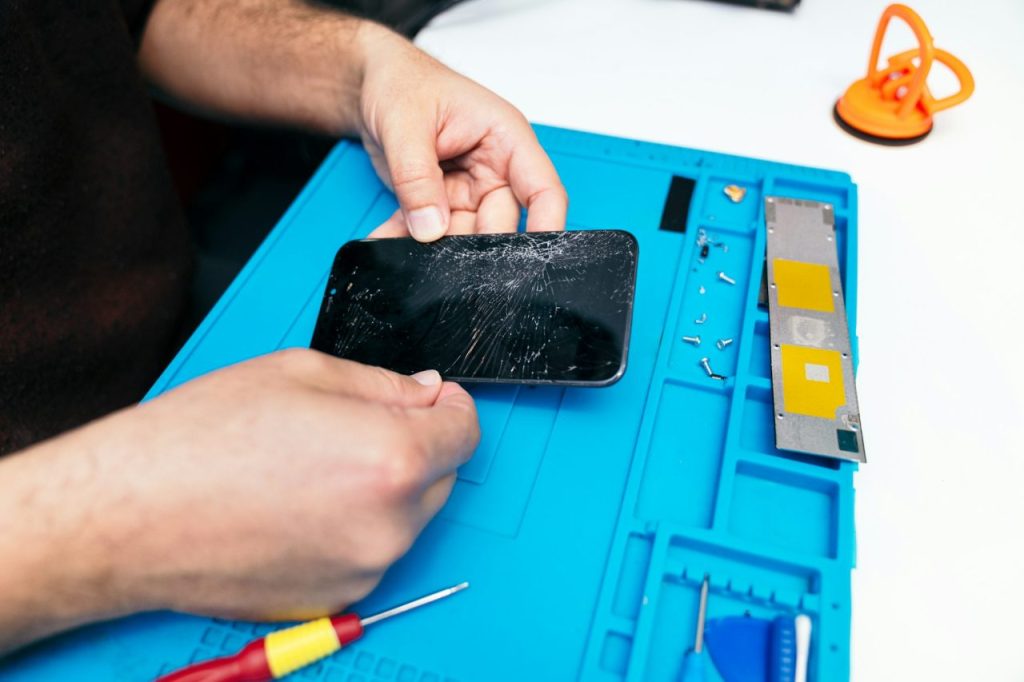
Step 3: Separate the Screen (15–30 min)
Use a suction cup to create a small gap, then slide plastic pry picks along the edge. Leave picks in place every inch to prevent the adhesive from re-sealing. Reheat edges as needed. Work around the entire perimeter. This is the most time-consuming step—don’t rush it.
Step 4: Disconnect Ribbon Cables (3–5 min)
Carefully lift the screen slightly—it’s still connected to the logic board. Flip it open like a book, locate the 2–4 ribbon cable connectors, and use a spudger to detach each one. Remove any brackets or screws securing them.
Step 5: Transfer Components (5–15 min)
Depending on your model, transfer the home button assembly (critical for Touch ID—handle the flex cable with extreme care), front camera bracket, and ambient light sensor from the old screen to the new one.
Step 6: Test Before Sealing (5 min)
Connect the new screen’s ribbon cables and power on. Test touch across the entire screen, display quality, camera, brightness sensor, and Touch ID/Face ID. It’s far easier to troubleshoot now than after the screen is glued down.
Step 7: Seal & Final Check (5–10 min)
Power down again. Apply pre-cut adhesive strips, carefully align the new screen, press into place starting from the cable side, and apply firm pressure around all edges. Power on and do a final functionality check.
7 Most Common iPad Screen Repair Mistakes
- Overheating the device — Too much heat for too long can swell the battery, warp the frame, or damage the LCD behind the glass. Use moderate heat in 2–3 minute intervals.
- Tearing ribbon cables — The flex cables are paper-thin. Never yank the screen up without disconnecting it first. A torn cable can cost as much as the screen itself.
- Forgetting to transfer the home button — The home button is paired to your iPad’s logic board. If you damage it, Touch ID is permanently lost. This is the most common mistake in DIY iPad repair.
- Using cheap replacement screens — A $15 screen from an unknown seller nearly always means poor touch sensitivity, washed-out colors, and early failure. Buy from iFixit, reputable Amazon sellers, or your repair shop.
- Skipping the pre-seal test — Always connect and test the new screen before applying adhesive. Discovering a defective screen after sealing means starting over from scratch.
- Not cleaning adhesive residue — Dust or old adhesive trapped under the new screen shows as visible specks. Clean the frame thoroughly with 90%+ isopropyl alcohol.
- Trying to DIY an iPad Pro — iPad Pro models have Face ID sensors adjacent to the display, ProMotion/OLED panels, and extremely tight tolerances. Even experienced DIYers regularly cause additional damage on these models. Professional repair is strongly recommended.
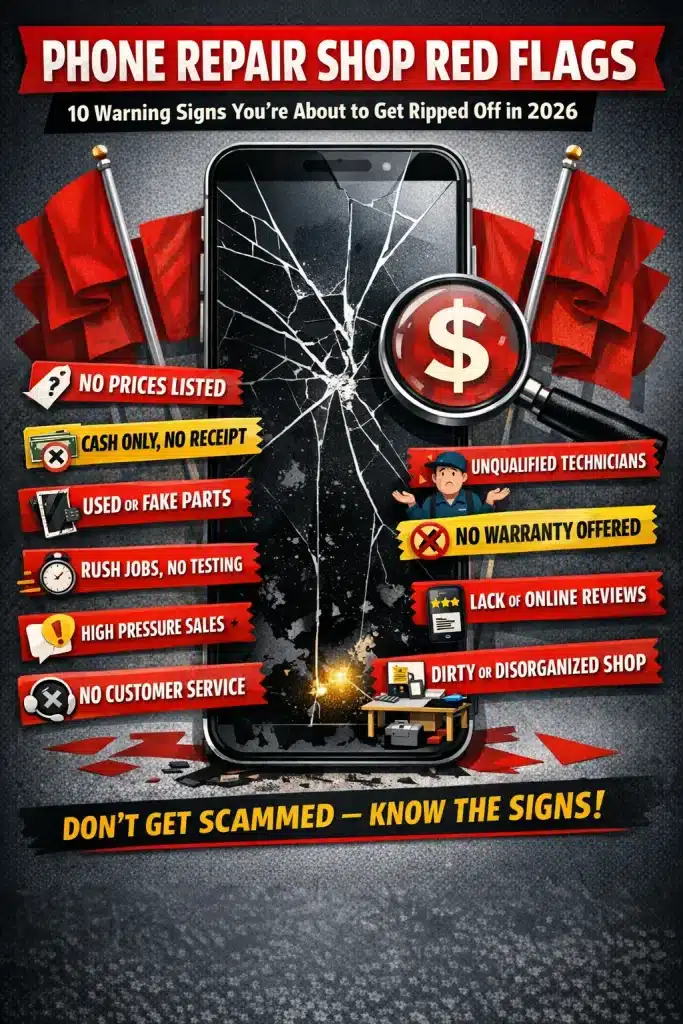
Should You Repair Your iPad Screen Yourself or Go to a Professional?
This is the most important decision, and the honest answer depends on your iPad model, your comfort level, and the math.
DIY Makes Sense When:
- You have an older, non-fused iPad (7th–9th gen) with digitizer-only damage
- You have some experience with electronics repair or are a patient beginner
- The iPad is out of warranty, and AppleCare+ has expired
- You’re comfortable investing 1–2 hours of your time to save $50–$150
Go Professional When:
- You own an iPad Pro or any model with Face ID—the complexity and parts cost make it worthwhile
- The iPad is still under warranty or AppleCare+
- You suspect damage beyond the screen (liquid damage, bent frame, battery swelling)
- You’re not comfortable with small electronics and delicate components
- The repair shop offers a warranty on their work
If you decide to go professional, look for an Apple Authorized Service Provider or a reputable independent repair shop. Helpertech, for example, offers expert iPad repair services in Eagan, MN, with trained technicians and quality parts. The right shop will use quality parts, offer a warranty, and have positive reviews from real customers.
How to Protect Your iPad Screen After Repair
You’ve invested time or money into this repair. Here’s how to avoid doing it again:
- Tempered glass screen protector ($10–$25): A sacrificial layer rated 9H hardness. Brands like amFilm, JETech, and ZAGG are top picks for iPads.
- The right case for your usage: Slim folio for couch use; rugged case (OtterBox, UAG) for field/workshop use; kid-proof EVA foam case (HDE, Bam Bino) if children use the iPad.
- Consider AppleCare+: Covers two accidental damage incidents per year. For expensive iPad Pro models, the math often favors having coverage. Third-party options like SquareTrade and Asurion offer similar coverage, sometimes cheaper.
FAQs
Can a cracked iPad screen be replaced?
How much does it cost to fix an iPad screen?
How long does iPad screen repair take?
Will replacing my iPad screen void the warranty?
Can a cracked iPad screen get worse over time?
Is it cheaper to repair or replace an old iPad?
What’s the difference between digitizer and LCD damage?
What tools do I need for DIY iPad screen repair?
Conclusion: Take Control of Your iPad Screen Repair
Repairing your iPad screen might seem intimidating at first glance, but with the right tools, a quality replacement part, and a healthy dose of patience, it’s absolutely within reach for most people. We’ve walked through everything, from diagnosing your specific type of screen damage to selecting the right tools and parts, to a detailed step-by-step replacement process, and the most common mistakes to avoid.
The bottom line? Be honest with yourself about your comfort level and the value of your iPad. If you’re working on an older model and enjoy hands-on projects, a DIY repair can save you hundreds of dollars. If you own a premium iPad Pro or you’re not confident handling delicate electronics, a professional repair service is worth every penny for the peace of mind and warranty that comes with it.
Whatever route you choose, don’t forget the final step: protect that new screen. A tempered glass protector and a solid case are a small investment that can prevent you from going through this whole process again.
Get Your iPad Screen Fixed Today
If you’re in Minnesota’s south metro, Helpertech offers professional iPad screen repair at our Eagan, Burnsville, Rosemount, and Apple Valley locations. We repair all iPad models, from older standard iPads to the latest iPad Pro, with quality parts and a warranty on every repair. Most iPad screen replacements are completed the same day. Walk-ins welcome.