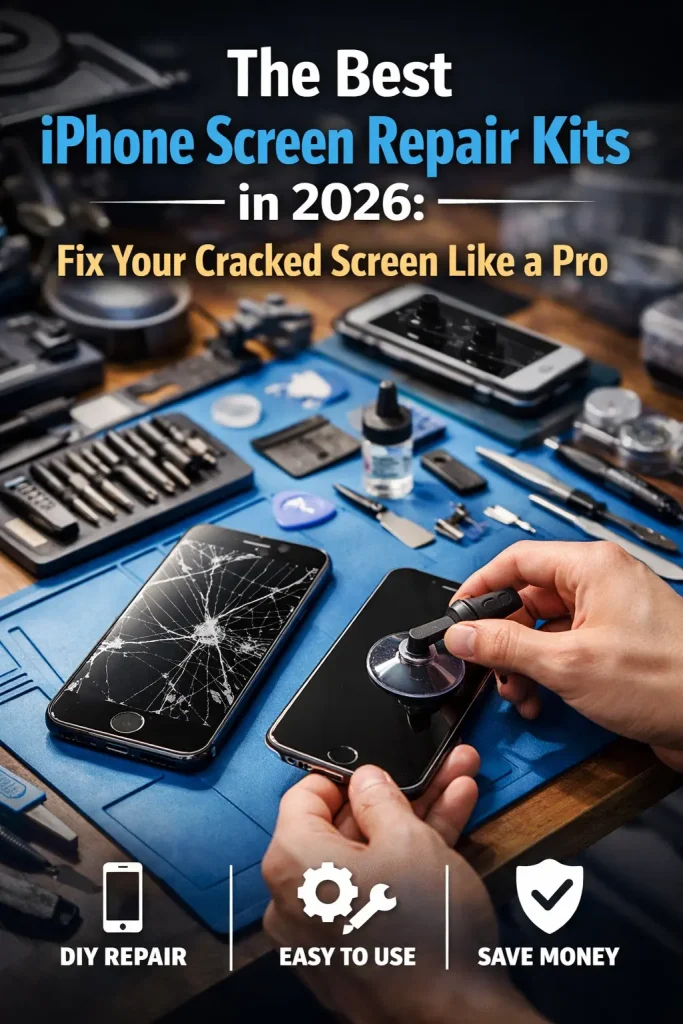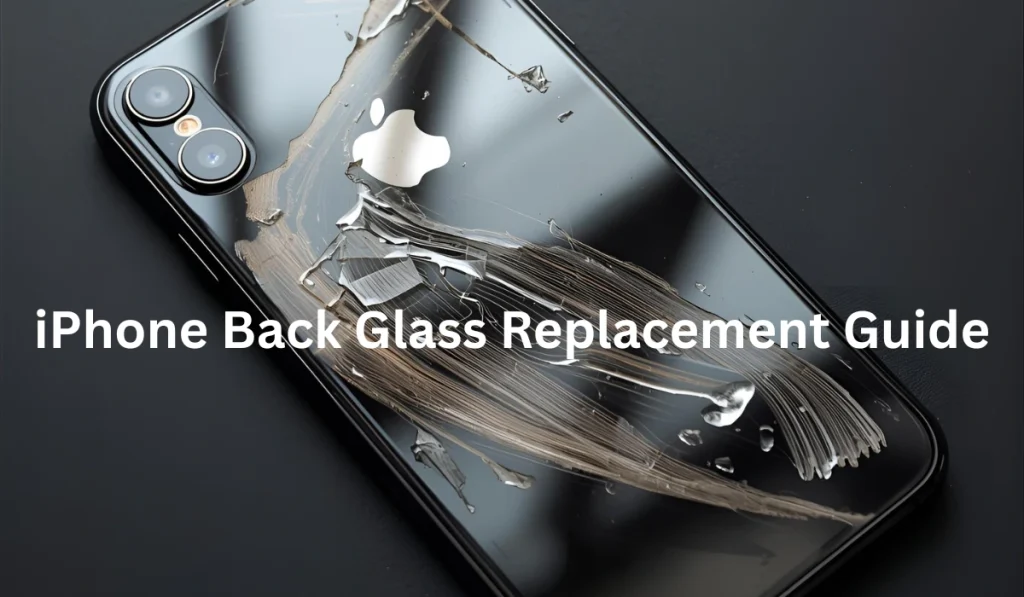
Introduction
Cracked iPhone back glass, it’s one of the most frustrating things that can happen to your device! Apple charges anywhere from $29 to $599 depending on your model and warranty status. That’s a significant chunk of change for what seems like a simple cosmetic issue. But here’s what most people don’t realize, iPhone back glass replacement is more complex than screen repairs because the glass is fused directly to the chassis.
Whether you’re dealing with a shattered iPhone 15 Pro Max or a cracked iPhone 12, you have options. Some are budget-friendly DIY solutions, while others require professional intervention with specialized equipment.
In this comprehensive guide, I’ll walk you through everything you need to know about iPhone back glass replacement in 2026! From understanding why it’s so expensive to fix, to exploring your repair options, cost comparisons, and even step-by-step DIY instructions if you’re feeling brave. Let’s dive in and save you some serious money while getting your iPhone looking pristine again.
Understanding iPhone Back Glass Damage
The sleek, glossy back of your iPhone isn’t just for aesthetics, it’s an integral part of the device’s structural design. When that glass cracks, you’re dealing with a repair that’s fundamentally different from a simple screen replacement.
Note: If your phone started losing power rapidly after impact or glass damage, this guide on iPhone battery draining fast explains how physical damage can affect battery performance.
Why iPhone Back Glass Is Particularly Vulnerable to Damage
Your iPhone’s back glass is exposed to damage during everyday use. Unlike the front screen, it usually has no protector, gets less visual attention, and often has less case cushioning, making it easier to crack during drops.
Key reasons the back glass breaks easily:
- No protective layer like a screen protector
- Less awareness when placing the phone down
- Cases prioritize front over rear protection
- Large, flat surface absorbs direct impact
Impact physics also work against it. The flat back surface spreads force differently, while corner drops concentrate pressure at a single point, often causing instant cracks. Although newer iPhones use Ceramic Shield on the front, the back glass does not always have the same reinforced protection.
Other weakening factors include:
- Sitting on the phone in tight pockets
- Repeated pressure from bags or car seats
- Small drops that cause invisible stress fractures
- Temperature changes that expand and contract the glass
Over time, tiny hairline cracks can quickly turn into full back glass shattering. If your damage is severe or spreading, professional iPhone back glass repair in Bloomington is the safest way to restore structural integrity and water resistance.
The Difference Between Front Screen and Back Glass Repairs
This is where repairs become technically very different. Starting with the iPhone 8, Apple fused the back glass directly into the phone’s chassis using industrial-grade adhesive. This means the back glass is no longer a simple removable panel, it is part of the phone’s structural body.
The front screen, by contrast, is designed to be replaceable with modular parts, flexible connector cables, and a frame built for clean disassembly.
Front Screen vs Back Glass Repair Comparison
Hera are the key differences at a glance:
| Feature | Front Screen Repair | Back Glass Repair |
|---|---|---|
| Structural Design | Modular and removable | Fused to the chassis |
| Repair Difficulty | Moderate | High |
| Disassembly Required | Partial device opening | Full teardown or laser separation |
| Tools Needed | Standard repair tools | Specialized laser equipment |
| Repair Time | 30–90 minutes | 2–4+ hours |
| Cost Range | Lower to moderate | Higher due to labor and tools |
| Apple’s Official Method | Replace screen only | Replace entire chassis |
| Third-Party Repair Option | Widely available | Limited to advanced repair shops |
Common Types of Back Glass Damage Across iPhone Models
Not all back glass damage looks the same, and each type creates different risks for your iPhone’s performance and safety.
Hairline Cracks
- Thin spider-web style lines
- Caused by minor drops or pressure
- Can stay stable for months
- Reduces water resistance and resale value
Complete Shattering
- Caused by hard drops on concrete or tile
- Creates sharp edges and loose glass pieces
- Exposes wireless charging coil to damage
- Eliminates all water resistance
Corner Impact Damage
- Cracks radiate outward from one corner
- Force concentrates where glass meets frame
- Titanium frames on newer models can worsen impact transfer
Camera Lens Area Damage
- Impact concentrates around the camera bump
- Can shatter camera glass while rest of back stays intact
- Puts expensive camera hardware at risk
Note: If your phone is unusable after impact, same-day iPhone repair in Rosemount, Apple Valley, and Bloomington lets you restore functionality without long delays.
Does Cracked Back Glass Affect iPhone Functionality?
A cracked back does not usually turn your iPhone into a paperweight, but it does create real functional risks that should not be ignored.
Wireless Charging Issues
- Charging coil sits directly under back glass
- Minor cracks may cause slower charging
- Severe shattering can make wireless charging unreliable or fail completely
Loss of Water Resistance
- Even a hairline crack breaks the IP68 seal
- Moisture can enter instantly
- One water exposure can destroy internal components
Reduced Resale and Trade-In Value
- Cracked backs reduce value by $50 to $200+
- Makes upgrades and trade-ins far less profitable
Hidden Internal Damage Risk
- Cracks can spread over time
- Wireless charging coils may shift
- NFC and antenna damage is possible
- Severe impact can cause delayed logic board failures
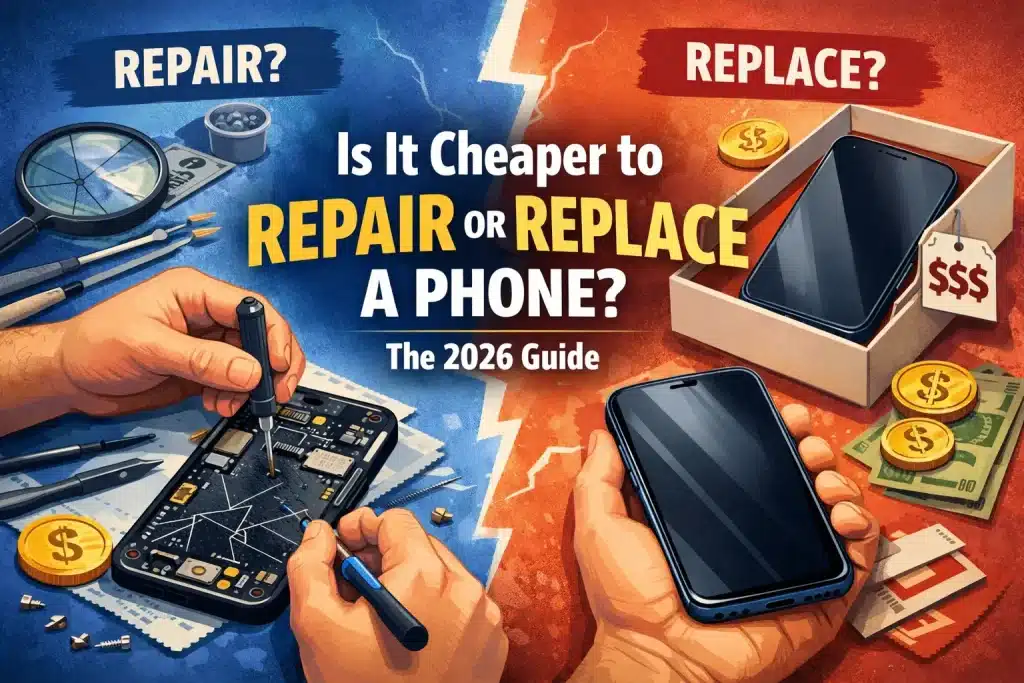
iPhone Back Glass Replacement Cost Breakdown (2026 Pricing)
Let’s talk money—because the cost of back glass replacement varies wildly depending on which route you choose. Understanding the pricing landscape helps you make an informed decision about repair versus replacement.
Apple Official Repair Pricing by Model
Apple’s official pricing structure for back glass replacement has evolved, but it remains on the expensive side of the spectrum. If you have AppleCare+, you’re looking at a $29 deductible for most back glass repairs, a reasonable cost that makes AppleCare+ worth it if you’re prone to drops.
Without AppleCare+, the picture changes dramatically. For the iPhone 15 Pro Max and iPhone 15 Pro, out-of-warranty back glass replacement costs $199. The standard iPhone 15 and iPhone 15 Plus come in at $169. These prices reflect Apple’s process of essentially replacing your device’s entire rear housing while transferring your internal components.
iPhone 14 series pricing sits slightly lower: $169 for the Pro models and $149 for the standard variants. iPhone 13 models run $129 to $149 depending on whether you have a Pro model. iPhone 12 repairs cost $99 to $129, while iPhone 11 and XS models are typically $99. Older models like the iPhone X, 8 Plus, and 8 range from $79 to $99.
The pricing strategy makes sense from Apple’s perspective, they’re not just swapping glass, they’re giving you a fully refurbished rear assembly with new adhesives, seals, and quality-tested components. You’re paying for Apple’s guarantee of quality, genuine parts, and preserved water resistance ratings. But that premium adds up quickly, especially if your iPhone is a few years old and approaching the end of its useful life anyway.
Third-Party Repair Shop Cost Comparison
Third-party repair shops operate in a different pricing universe than Apple, and the quality spectrum is just as wide. Most local independent repair shops charge between $99 and $250 for iPhone back glass replacement, depending on your model and whether they use laser separation or full housing replacement.
Why Quality and Method Matter More Than Just Price
Not all back glass repairs are equal. The repair method directly affects durability, appearance, and long-term performance:
- Laser separation method: Only the broken glass is removed while preserving original internal components. This delivers the best cosmetic and structural results when done correctly.
- Full housing replacement: The entire frame and back panel are swapped using aftermarket parts. This can be faster but may reduce resale value and original build quality.
Warranty coverage also varies widely. Some shops offer 30 to 90 days, while others advertise “lifetime warranties” that often exclude labor and impact damage. A realistic 90-day to 1-year warranty is a stronger indicator that a shop truly stands behind its work.
Why Many iPhone Users Choose Helpertech for Back Glass Repairs
At Helpertech, back glass repairs are handled using advanced laser removal, precision tools, and model-specific calibration, not rushed housing swaps. Pricing stays competitive with local shops, while quality aligns closer to premium national chains, without the inflated branding costs.
What sets Helpertech apart in real-world terms:
- Transparent pricing with no surprise upsells
- High-quality glass with proper heat dissipation
- Skilled technicians trained specifically in laser back glass separation
- Realistic, meaningful warranty on parts and labor
- Same-day service available for many models
DIY Repair Costs and Tool Investment
If you are comfortable working with electronics and willing to invest the time, DIY repair can offer noticeable cost savings. However, the real cost is not just the glass, it is the tools, materials, and hidden risk that come with doing the repair yourself.
Back Glass Part Costs (By Quality Tier)
- Budget aftermarket glass: $30 to $60
Functional replacement with possible color mismatch and fit issues. - Mid-range quality glass: $60 to $100
Better appearance and closer-to-OEM finish. - Premium suppliers (iFixit level): $100 to $150
High-grade glass approaching original factory quality.
DIY Tool Investment (One-Time Purchase)
- Basic iPhone repair toolkit: $50 to $100
- Heat gun or temperature-controlled heating plate: $40 to $150
- Magnetic project mat for screw tracking: $15 to $30
👉 A hairdryer is not a safe substitute for proper temperature-controlled heating.
Hidden Material Costs
- Isopropyl alcohol: $5 to $10
- Lint-free wipes: $10
- Adhesive strips or liquid adhesive: $10 to $30
True First-Time DIY Cost Range
When you factor in parts, tools, and materials, a first-time DIY back glass repair typically costs: $150 to $350 total. That cost comes down for future repairs once you already own the tools.
Is DIY Worth It Financially?
- ✅ Saves $50 to $200 compared to professional repair on a single device
- ✅ Makes strong financial sense for repeat repairs
- ✅ Valuable learning experience
But there is also real risk:
- ❌ One mistake can destroy internal components
- ❌ Wireless charging coils can tear easily
- ❌ Logic board damage turns a small repair into a full device loss
👉 If your time is valuable or you are not confident in your technical skill, professional repair remains the safer investment. Back-glass cracks near the camera often lead to lens damage, making this iPhone camera lens replacement cost guide highly relevant.
Should You DIY or Hire a Professional?
This decision point determines everything else about your repair journey. Be honest with yourself about your capabilities, because a botched DIY repair can transform a $200 fix into a $600 device replacement.
Evaluating Your Technical Skill Level Honestly
- Do you have experience repairing electronics? If you’ve successfully replaced laptop hard drives, built a desktop computer, or done previous smartphone repairs, you have relevant transferable skills. iPhone back glass replacement requires steady hands, patience, attention to detail, and comfort working with tiny components.
- The patience factor can’t be overstated. This isn’t a 20-minute YouTube tutorial repair. First-time back glass replacements typically take 3 to 5 hours, with a significant portion spent carefully heating and prying adhesive. If you’re the type who gets frustrated and starts forcing things when they don’t go smoothly, professional repair is your friend.
- Precision matters enormously. You’ll be working with screws smaller than grains of rice, ribbon cables that tear if you breathe on them wrong, and glass that can slice your finger open if handled carelessly. One moment of carelessness can destroy a $50 ribbon cable or crack the new glass you just spent money on.
- Risk tolerance is the honest conversation you need to have with yourself. Are you okay with the possibility that you might completely brick your iPhone during this repair? Because it’s possible. It’s not likely if you follow instructions carefully, but dropped screws can short circuits, excessive heat can damage batteries, and prying tools in the wrong location can sever essential cables. If the thought of potentially rendering your iPhone unusable makes you nauseous, pay for professional repair and sleep soundly.
Pros and Cons of DIY iPhone Back Glass Replacement
DIY iPhone back glass replacement can be tempting because of the lower upfront cost and the satisfaction of fixing your own device. But while the savings are real, so are the risks.
✅ Pros of DIY Back Glass Repair
- Lower upfront cost: DIY repair typically costs $80 to $200 all-in for parts and tools, compared to $150 to $400 for professional repair.
- Better value for older iPhones: If your phone is worth only $200 to $300, saving $150 to $200 on repairs can make strong financial sense.
- Full control over parts quality: You choose between budget, mid-range, or premium OEM-quality glass.
- Work on your own schedule: No waiting for shop availability or repair queues.
- Learning experience and personal satisfaction: Many users enjoy the challenge and sense of accomplishment after a successful repair.
❌ Cons of DIY Back Glass Repair
- You assume 100 percent of the risk: Crack the new glass, damage a cable, or misalign components, and the cost is on you.
- Permanent feature loss is possible: Mistakes can disable Face ID, wireless charging, NFC, or camera functions permanently.
- Warranty and AppleCare+ are voided immediately: Any remaining coverage is lost once the phone is opened.
- Major time investment: First-time repairs often take an entire afternoon or evening, while professionals finish in 1 to 2 hours.
- High difficulty on newer models:
- iPhone 12 and newer models with MagSafe add complexity
- iPhone 14 Pro models require extreme care due to the large camera system
- Attempting DIY on an iPhone 15 Pro Max as your first repair is very high risk
✅ Quick Decision Guide
- DIY makes sense if:
- You are repairing an older iPhone
- You are comfortable with delicate electronics
- You have time and patience
- Professional repair is the smarter choice if:
- Your phone is newer or high-value
- You need it working the same day
- You want zero risk of permanent damage
When Professional Repair Is the Smarter Choice
here when you should choose professional repair service:
- Complex iPhone models, specifically the iPhone 12 and everything newer, have MagSafe ring arrays that must be perfectly aligned during reassembly. Mess up the MagSafe alignment, and your wireless charging and magnetic accessories won’t work correctly. Professional shops have jigs and alignment tools that ensure proper placement. You’re eyeballing it and hoping for the best.
- Warranty preservation is critical if you have active AppleCare+. Any DIY repair immediately voids AppleCare+ coverage for that device. If you’re paying $8 to $13 monthly for AppleCare+ and then void it by doing DIY repair to save $170, you’ve made a questionable financial decision—especially if you later need warranty service for a different issue.
- Lack of proper tools or workspace makes DIY repair frustrating at best, dangerous at worst. If you’re working on your kitchen counter without a heat gun, proper lighting, or organization system for screws, you’re setting yourself up for failure. Professional shops have climate-controlled workspaces, proper ventilation for adhesive fumes, and magnetic mats to keep track of components.
- Additional damage beyond just back glass is the red flag scenario. If your iPhone took a hard enough hit to shatter the back glass, there’s a decent chance internal components suffered damage too. Professional diagnostics can identify issues like damaged wireless charging coils, bent frames, or compromised logic boards before repair begins. DIY repair might “succeed” in replacing the glass while missing underlying problems that manifest later.
Understanding Warranty Implications
Any DIY or third-party iPhone repair is treated as unauthorized by Apple, which means AppleCare+ and remaining factory warranty can be completely voided if such repairs are detected. Even if a future issue is unrelated, Apple may deny service. While some third-party shops participate in Apple’s Independent Repair Provider program and can preserve warranty, most local repairs still carry risk to your remaining coverage.
Right to Repair laws and Apple’s Self Service Repair program have improved access to genuine parts and manuals, but DIY repairs still involve high tool costs and limited savings compared to the warranty value you may lose. For newer iPhones with active coverage, you should always weigh long-term warranty protection against short-term repair savings before deciding.
Tools and Materials Needed for DIY Back Glass Replacement
If you’re committed to DIY repair, having the right tools isn’t optional—it’s the difference between success and a $1,000 mistake.
Essential DIY Tools
- Heat gun or heat plate (for softening adhesive)
- Precision screwdrivers (P2, P5, tri-point)
- Plastic pry tools and spudgers
- Suction cups for safe lifting
- Fine-tip tweezers
- Magnetic project mat for screw organization
👉 A hairdryer does not generate enough heat for safe back glass removal.
Replacement Parts and Buying Tips
- Back glass prices range from $30–$150 by quality
- “OEM-quality” usually means aftermarket made to OEM specs
- Trusted suppliers include iFixit and Injured Gadgets
- Always verify model, size, and color compatibility before ordering
- Full rear housing assemblies cost more but simplify installation
Adhesive and Cleaning Supplies
- Pre-cut adhesive strips ($10–$25)
- Liquid adhesive like T-7000
- 90%+ isopropyl alcohol
- Lint-free wipes or microfiber cloths
Basic Safety Gear
- Safety glasses (glass shards are common)
- Cut-resistant or nitrile gloves
- Well-ventilated work area
- Non-metal work surface
Step-by-Step DIY iPhone Back Glass Replacement Tutorial
You’ve gathered your tools, cleared your schedule, and committed to the repair. Now comes the moment of truth, actually doing the work. This process requires patience, care, and attention to detail.
Preparation and Safety Precautions
Back up your iPhone with iCloud or a computer so you do not risk losing photos, messages, or app data if something goes wrong. Power off the phone completely and remove the SIM tray, then set it aside in a safe place.
Set up an organized workspace with good lighting, a clean surface, and a screw map or magnetic mat so every screw has a clear spot. As you disassemble, keep screws grouped by location, since iPhone screws are not interchangeable and the wrong screw in the wrong hole can cause damage.
Removing the Damaged Back Glass Safely
Use a heat gun or heat plate to warm the edges of the back glass evenly until the adhesive softens. Start at one edge, then work your way around rather than heating the whole back randomly.
Place a suction cup near a bottom corner and gently lift while sliding a thin plastic pick into the gap. Work slowly around the frame, keeping tools shallow to avoid hitting the charging coil and cables, and reapply heat whenever a section feels stuck rather than forcing it.
Cleaning the iPhone Chassis Thoroughly
Once the glass is off, remove old adhesive with plastic spudgers while it is still slightly warm so it peels off more easily. Avoid metal tools that can gouge the frame.
Clean all bonding surfaces with 90 percent or higher isopropyl alcohol and a lint free cloth, then inspect the charging coil, camera area, and interior for signs of damage. Let everything dry fully before moving on and quickly wipe the new glass to remove fingerprints or oils.
Installing the New Back Glass Panel
Apply pre cut adhesive strips or a thin bead of liquid adhesive around the frame, staying slightly inside the edge to prevent squeeze out. Give liquid adhesive a short moment to get tacky before placing the glass.
Align the new back glass carefully around the camera, ports, and buttons, then lower it into place slowly from one edge to the other. Once aligned, press firmly across the whole surface for a minute or two and let the adhesive cure according to the product instructions before putting the phone under stress.
Testing Functionality After Replacement
When the adhesive has had some time to set, test wireless charging on a Qi pad to confirm the coil is positioned correctly. Open the Camera app and check all lenses for focus and clarity, looking for any haze or misalignment.
Finally, test Apple Pay or an NFC tag if possible, and inspect the edges of the back glass for gaps or raised areas. Minor cosmetic imperfections are normal for DIY work, but large gaps or non working features usually mean something needs to be reopened and adjusted.
Model-Specific Repair Considerations
Different iPhone models have unique quirks, challenges, and considerations that affect back glass replacement difficulty and success rates.
iPhone 15 Series Back Glass Replacement Specifics
The iPhone 15 lineup introduces several repair challenges that make DIY work especially risky.
- Color-infused frosted glass on iPhone 15 and 15 Plus is difficult to color-match with aftermarket parts
- MagSafe alignment is extremely sensitive, even slight misalignment causes weak magnetic hold
- Action Button on Pro models adds a fragile cable near the frame
- USB-C port is more delicate than Lightning and can be heat-damaged during removal
Because of these factors, professional tools and alignment jigs are strongly recommended for iPhone 15 repairs.
iPhone 14 and 13 Series Unique Challenges
These models remain very repairable, but they introduce their own technical complications.
- Large camera bumps increase camera-area glass damage
- MagSafe ring can detach during aggressive glass removal
- Ceramic Shield back glass is harder to separate cleanly
- Stronger adhesive around the camera requires extra heat and care
Mistakes here often affect wireless charging and camera alignment. iPhone 13 Pro users with shattered backs can reference this affordable iPhone 13 Pro back glass replacement service for model-specific solutions.
iPhone 12 and 11 Series Repair Tips
These models are more DIY-friendly than newer iPhones.
- Simpler internal layout with more working space
- Lower-cost replacement parts are widely available
- iPhone 11 has fragile sensor cables near the top edge
- iPhone 12 has a delicate wireless charging coil near the center
- Pro models use matte glass, which must be matched correctly
For first-time DIY repairs, iPhone 11 and 12 are the safest starting point.
Older iPhone Models (X, XS, XR, 8)
Older models are the easiest to physically repair, but not always the smartest to fix.
- iPhone 8 is the easiest back glass repair Apple ever made
- OEM-quality parts are harder to find for older models
- Repair costs often exceed the resale value
- Spending $150 to fix a $120 iPhone usually makes no financial sense
👉 The best value repair range is iPhone X through iPhone 13, where repair costs still justify the device value.
Common Mistakes to Avoid During Back Glass Replacement
Learning from others’ mistakes is cheaper than making them yourself. These are the errors that turn repairable iPhones into expensive paperweights.
Rushing the Heating and Adhesive Removal Process
- Overheating can damage the battery and melt internal plastics
- Uneven heating causes stress cracks during prying
- Forcing tools before adhesive softens breaks frames and cables
- First-timers should expect 30–45 minutes of careful heating, not 10 minutes
Using Incorrect or Low-Quality Replacement Parts
- Cheap glass often has sharp edges and poor fit
- Color mismatches look obvious in daylight
- Missing Apple logo or rough camera cutouts signal low-grade parts
- $30 parts that fail during install waste both time and money
Damaging Internal Components During Repair
- Wireless charging coil can tear or shift
- NFC antenna damage breaks Apple Pay
- Metal tools can permanently destroy the logic board
- Dust and glass shards can scratch camera lenses
Inadequate Adhesive Application
- Poor sealing allows moisture intrusion over time
- Uneven pressure creates weak lift points
- Using the phone before full cure weakens the bond
- Visible gaps mean the seal has already failed
Forgetting to Test All Features Before Declaring Success
- Wireless charging may fail after full reassembly
- Face ID, NFC, or buttons may stop working later
- Camera dust issues are common if not checked
- Skipping post-repair testing often doubles repair time
Alternatives to Full Back Glass Replacement
Not everyone needs or wants to replace cracked back glass, and several alternatives exist that might better suit your situation and budget.
Using a Protective Case to Hide the Damage
- Heavy-duty cases like OtterBox Defender fully conceal cracks
- Slim cases like Spigen, Caudabe, and Totallee also hide damage
- Wireless charging may be 10–15% slower with thick cases
- Apple Pay and NFC are not affected
- Safe for hairline cracks, risky for severe shattering
- Does not restore water resistance
- Cost-effective solution at $20–$60
Vinyl Wraps and Skins as Cosmetic Solutions
- Brands include dbrand, Slickwraps, and Sopiguard
- Cost ranges from $15–$30
- Works well over minor scratches and hairline cracks
- Does not adhere well over deep cracks or missing glass
- Offers no drop protection
- Does not restore water resistance
- Ideal for aesthetic upgrades and personalization
Glass-Only Replacement vs. Housing Replacement Methods
Laser glass-only replacement:
- Uses specialized machines
- Preserves original frame and components
- Results look factory-new
- Typical cost: $150–$250
Full housing swap:
- Entire aftermarket frame and back installed
- Easier than glass-only repair
- Cost: $100–$200
- Cheaper housings often have fit and logo issues
Trade-In Programs Despite Back Glass Damage
- Apple Trade-In drops value by $50–$100+ for cracked backs
- Carrier trade-ins reduce value more aggressively
- Third-party buyback sites often pay $20–$50 more than Apple
Always calculate:
- If repair costs more than value gained, do not repair
- If repair adds more value than it costs, repair first
When to Just Upgrade to a New iPhone Instead
- If repair cost exceeds device value increase, skip repair
- Older models (3–4+ years) rarely justify expensive repairs
- If new iPhone launch is 2–3 months away, waiting makes sense
- If you are 8–10 months away, repair may be worth it
Sometimes upgrading improves:
- Battery life
- Camera quality
- Software support
- Daily user satisfaction
Finding Reputable Professional Repair Services
If you’ve decided DIY isn’t for you, choosing the right professional repair service determines whether you get a quality repair or a new set of problems.
Questions to Ask Before Choosing a Repair Shop
- What is the warranty length (30 days, 90 days, 1 year, lifetime)?
- Does the warranty cover parts only or parts and labor?
- What voids the warranty (water damage, drops, later repairs)?
- Are the parts:
- Genuine Apple
- OEM-quality aftermarket
- Standard aftermarket
- Are technicians certified and experienced?
- How many back glass repairs are done monthly?
- What is the realistic turnaround time (same-day, 1–2 days, 3–5 days)?
- Will they provide written warranty terms and final pricing?
What to Check Before Choosing a Shop
- Clear written warranty of at least 30–90 days
- Parts quality disclosure (genuine, OEM-quality, or aftermarket)
- Experienced technicians who perform back glass repairs regularly
- Realistic turnaround time (same-day or 1–2 days is normal)
- Final price in writing with no hidden fees
Red Flags to Avoid
- No warranty offered
- Prices far below local averages
- Vague answers about the repair process
- Repeated complaints about new issues after repair
Apple Authorized vs Independent Shops
- Apple Authorized: Genuine parts, warranty preserved, higher cost
- Independent Shops: Lower cost, faster service, warranty depends on shop
✅ Bottom line: Always choose transparency, experience, and written warranty over the cheapest price.
Preventing Future iPhone Back Glass Damage
Once your back glass is repaired or protected, the next goal is to prevent it from cracking again. A few smart habits and the right accessories can dramatically reduce your risk of repeat damage.
Use a High-Quality Protective Case
- Choose cases with raised back edges and corner impact protection
- Dual-layer or shock-absorbing cases offer the best defense
- Avoid ultra-thin fashion cases if you drop your phone often
Add a Back Glass Protector
- Tempered glass protectors absorb impact before the rear glass does
- Cheap insurance against shattering
- Invisible protection that preserves phone aesthetics
Avoid Back Pocket Carrying
- Sitting on your phone creates pressure cracks over time
- Back pockets are the most common cause of spider-web fractures
- Front pocket or bag storage is far safer
Be Careful Around Hard Surfaces
- Concrete, tile, and stone floors cause the worst damage
- Set your phone down on soft or non-slip surfaces
- Never balance your phone on sink edges or gym equipment
Control Heat Exposure
- Heat weakens glass and adhesive over time
- Avoid leaving your iPhone in hot cars
- Remove thick cases while charging if the phone runs hot
✅ Bottom Line
Most back glass damage is preventable with proper cases, smart handling, and pressure awareness. A few small changes today can save you from another expensive repair tomorrow.
Conclusion
iPhone back glass replacement doesn’t have to be a wallet-draining nightmare! Whether you’ve decided to tackle the DIY route and save $200-$400, or you’re opting for professional repair with the peace of mind it brings, you now have all the information you need to make the best decision for your situation and skill level.
Remember, the key factors to consider are your iPhone model (newer models are more complex!), your technical confidence, the total cost including tools and parts, and how much you value your device’s warranty status. For many people, a professional repair from a reputable third-party shop offers the sweet spot between Apple’s premium pricing and the risks of DIY.
The most important takeaway? Don’t ignore cracked back glass. What starts as a cosmetic issue can compromise your iPhone’s water resistance and wireless charging, potentially leading to more expensive repairs down the line. Whether you’re dealing with a hairline crack or a completely shattered back panel, taking action now will preserve your iPhone’s functionality and resale value.
Ready to get your iPhone looking pristine again? Choose Helpertech and let’s get your device back to perfect condition together.