Introduction
Here’s a stat that might make you wince — the average cost of an iPhone screen repair now exceeds $300. Ouch! If you’re wondering just how involved that process is, check out this breakdown on how long it takes to replace an iPhone screen. If you’ve just unboxed (or are about to unbox) the stunning new iPhone 17, the last thing you want is a cracked screen or a sluggish device because you skipped a few crucial setup steps. I get it. That fresh-out-of-the-box excitement is real. You want to dive straight into the new camera features and that gorgeous display. But trust me, taking just 30 minutes on day one to properly protect your iPhone 17 can save you hundreds of dollars and countless headaches down the road.
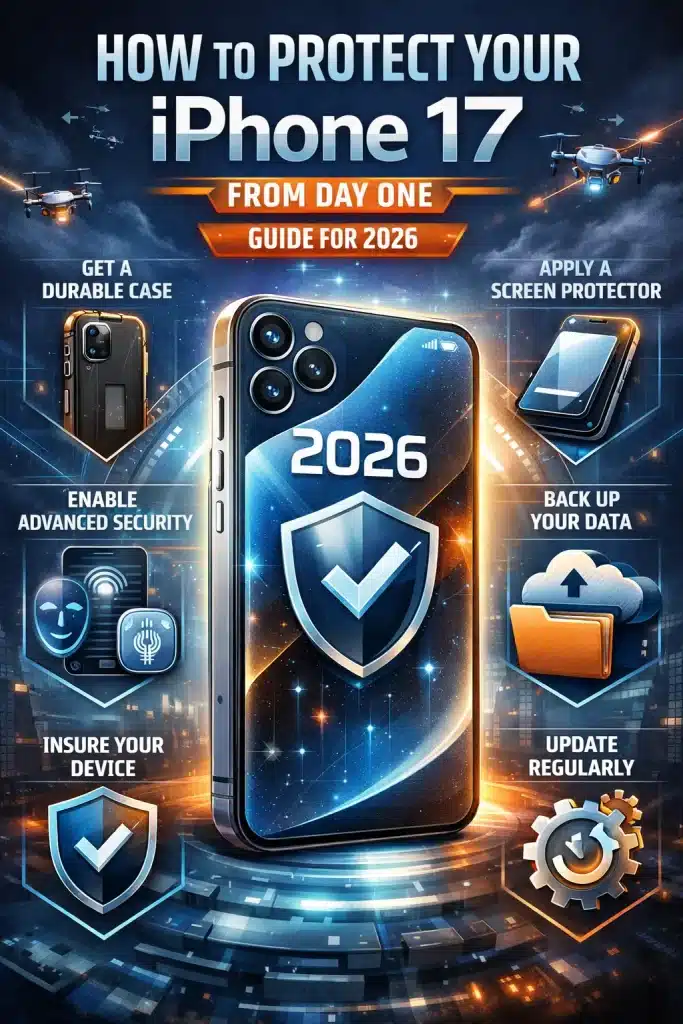
In this complete guide, I’ll walk you through everything you need to know about safeguarding your new device. We’re talking physical protection, software security, data backup strategies, and even some lesser-known tips most people overlook entirely.
Whether you’re upgrading from an older model or this is your very first iPhone, this guide has you covered from the moment you peel off that plastic wrap. Let’s make sure your iPhone 17 stays flawless for years to come.
1. Unboxing Your iPhone 17 the Right Way — First Steps Matter
I know, I know, you want to rip that box open and start playing with your shiny new device. But hear me out! The first few minutes with your iPhone 17 are more important than you think. Rushing through setup can mean missing critical security features that Apple tucked into the onboarding flow.
Inspect Before You Commit
Before you do anything else, take a close look at your device. Check the screen for dead pixels, examine the edges for any dings or scratches, and make sure all the buttons respond properly. Apple’s return window is generous, but it won’t last forever. If something looks off, document it with photos and contact Apple Support immediately.
Register and Activate Your Warranty
Your iPhone 17 comes with a one-year limited warranty from Apple, but it only kicks in once you activate the device. Sign in with your Apple ID during setup, and your warranty registration happens automatically. Keep your original receipt, digital or physical, in a safe place. You’ll need it if you ever file a claim.
SIM and eSIM Setup
The iPhone 17 lineup relies heavily on eSIM technology. During activation, choose your carrier carefully and verify your plan includes device protection options. Some carriers offer bundled insurance at a discount when you activate a new line. It’s worth checking before you skip past that screen!
2. Best iPhone 17 Cases for Maximum Protection in 2026
A case is the single most important investment you can make for your iPhone 17. Full stop. Even if you love the look of a naked iPhone (and honestly, the iPhone 17’s design is gorgeous), one drop on concrete and you’ll wish you’d slapped on some protection.
Types of Cases
- Slim cases: Slim cases:
These offer basic scratch and minor drop protection while keeping the iPhone 17’s sleek profile. Brands like Totallee and Peel are favorites for minimalists.
- Rugged cases: Rugged cases:
Built for serious drop protection, these cases from OtterBox, UAG, and LifeProof can withstand falls from significant heights. If you work outdoors or have butterfingers, this is your category.
- Clear cases: Clear cases:
Want to show off your iPhone 17’s color while keeping it safe? Spigen’s Ultra Hybrid and Casetify’s clear options offer excellent protection without hiding the design.
- Wallet cases: Wallet cases:
Consolidate your phone and cards into one package. Just keep in mind that wallet cases add bulk and can interfere with wireless charging on some models.
MagSafe Compatibility
This is non-negotiable in 2026. Make sure whatever case you choose is MagSafe-compatible. The iPhone 17’s MagSafe system is more powerful than ever, and you’ll want full access to wireless chargers, wallet attachments, and car mounts that snap on magnetically.
What “Military-Grade” Actually Means
You’ve seen it on the packaging — “Mil-STD-810G tested.” Sounds impressive, right? Here’s what it actually means: the case has been tested against a U.S. military standard for environmental conditions, including drops from about four feet onto plywood. It’s a decent baseline, but it doesn’t mean your phone is indestructible. Think of it as good insurance, not an invincibility shield.
3. Screen Protectors That Actually Work — Tempered Glass vs. Film
Your iPhone 17 ships with Apple’s Ceramic Shield front cover, which is impressively tough. But “tough” doesn’t mean “scratch-proof.” Sand, keys, and even some fabrics can leave micro-scratches over time. A quality screen protector adds an extra layer of defense without compromising the viewing experience. And if the worst does happen, our iPhone screen replacement guide walks you through everything you need to know.
Tempered Glass
This is the gold standard for most users. Tempered glass protectors are typically 9H hardness, which means they resist scratches from almost everything you’ll encounter daily. They’re easy to install, feel great under your fingertips, and if they crack, they absorb the impact so your actual screen doesn’t have to. Brands like amFilm, Spigen GlasTR, and Belkin are all solid choices.
TPU Film
Film protectors are thinner and more flexible, which means they handle curved edges better. They’re also self-healing — minor scratches can disappear on their own over time. The tradeoff? They don’t feel quite as smooth as glass and offer less impact protection. Good for people who prioritize a barely-there feel.
Application Tips
Bubbles are the enemy. Here’s how to beat them: clean your screen with the included alcohol wipe first. Use the dust removal sticker to pick up any remaining particles. Apply the protector in a steam-filled bathroom (seriously!) — the humidity keeps dust from settling. Align from the top down, and use a credit card to push out any trapped air. Most quality protectors come with alignment guides that make this foolproof.
Face ID and Touch Sensitivity
Good news — modern screen protectors are designed to work seamlessly with Face ID. The IR sensors on the iPhone 17 won’t be affected by any reputable protector. Touch sensitivity remains excellent with tempered glass. With film protectors, you might notice a very slight difference, but most people adapt within a day.
4. Essential iPhone 17 Settings to Enable on Day One
Physical protection is only half the battle. The real magic happens in your settings. Apple has packed the iPhone 17 with powerful security features, but many of them aren’t enabled by default. Let’s fix that right now.
Face ID and Passcode
Set up Face ID during your initial setup; don’t skip it. Then, instead of a simple 6-digit PIN, go to Settings > Face ID & Passcode and switch to a custom alphanumeric passcode. Yes, it takes an extra second to type, but it’s exponentially harder to crack. A 6-digit PIN has one million possible combinations. An 8-character alphanumeric password? Over two trillion.
Find My iPhone
Go to Settings > [Your Name] > Find My > Find My iPhone and make sure everything is toggled on — including “Send Last Location” and the Find My network. This means your iPhone can be located even when it’s offline by piggybacking on other Apple devices nearby. If your phone is ever lost or stolen, this feature is worth its weight in gold.
Stolen Device Protection
This is the feature Apple introduced that too many people still don’t know about. When enabled, Stolen Device Protection requires biometric authentication (Face ID or Touch ID) for sensitive actions like changing your Apple ID password or turning off Find My, even if someone knows your passcode. Enable it under Settings > Face ID & Passcode > Stolen Device Protection.
Automatic Updates
Navigate to Settings > General > Software Update > Automatic Updates and turn on both iOS updates and Security Responses. Apple regularly patches vulnerabilities, and delaying updates leaves you exposed. Let your phone handle this overnight while it’s charging.
Emergency SOS and Medical ID
Set up Emergency SOS under Settings > Emergency SOS and configure your Medical ID in the Health app. In a real emergency, first responders can access your critical health information and emergency contacts even from your lock screen. It takes two minutes to set up and could literally save your life.
Two-Factor Authentication
If you haven’t already enabled two-factor authentication for your Apple ID, do it now. Go to Settings > [Your Name] > Sign-In & Security > Two-Factor Authentication. This adds an extra verification step whenever someone tries to sign into your account from a new device. It’s the single most effective way to prevent unauthorized access to your iCloud data.
5. Protecting Your iPhone 17 from Water, Heat, and Physical Damage
The iPhone 17 comes with an impressive IP68 water resistance rating. But here’s the thing most people get wrong — that rating is tested in a lab under controlled conditions. Real life is a lot messier.
Water Resistance: What It Really Means
IP68 means your iPhone 17 can survive submersion in fresh water up to 6 meters for 30 minutes. Sounds great, right? But here’s the fine print: that doesn’t cover salt water, chlorinated pool water, soapy water, or any liquid that isn’t pure freshwater. And water resistance degrades over time as the seals wear. Never intentionally submerge your phone, and if it does get wet, dry it thoroughly before charging. If water damage occurs, our iPhone water-damage repair guide can help you understand your options.
Temperature Extremes
Your iPhone 17 is designed to operate between 32°F and 95°F (0°C to 35°C). Leave it on your car dashboard on a summer day, and you could trigger a thermal shutdown — or worse, cause permanent battery damage. In extreme cold, the battery can drain rapidly, and the screen may become temporarily unresponsive. The fix? Keep your phone in an inside pocket during winter and never leave it in a parked car during summer.
Smart Habits for Everyday Protection
- Never put your phone in the same pocket as keys or coins
- Avoid setting it face down on rough surfaces
- Use a wireless charger to minimize wear on the charging port
- Keep it out of the bathroom during hot showers (steam can bypass water seals)
- Invest in a quality car mount instead of tossing it on the seat
6. Data Security and Privacy Settings You Shouldn’t Ignore
Your iPhone 17 doesn’t just hold your photos and messages — it holds your entire digital life. Banking apps, health data, personal conversations, location history. Protecting this data isn’t optional. It’s essential.
App Tracking Transparency
When apps ask to track your activity across other companies’ apps and websites, say no. Go to Settings > Privacy & Security > Tracking and toggle off “Allow Apps to Request to Track.” This prevents apps from collecting data they don’t need to function.
Location Services
Review which apps have access to your location under Settings > Privacy & Security > Location Services. Set most apps to “While Using” rather than “Always.” Very few apps genuinely need constant access to your GPS coordinates. Social media apps, games, and shopping apps? They definitely don’t.
Safari Privacy
Enable Prevent Cross-Site Tracking in Safari settings. Turn on Hide IP Address from Trackers. If you have an iCloud+ subscription, activate Private Relay — it encrypts your browsing traffic so neither Apple nor your internet provider can see your full browsing history. It’s like a lightweight VPN built right into your phone.
Hide My Email
Another iCloud+ perk. When you sign up for newsletters, free trials, or sketchy websites (we’ve all been there), use Hide My Email to generate a random email address that forwards to your real inbox. If the spam starts rolling in, just delete the alias. Your real email stays clean.
iCloud Keychain
Stop reusing passwords. Seriously. Enable iCloud Keychain under Settings > [Your Name] > iCloud > Passwords and Keychain and let it generate and store unique, complex passwords for every account. It syncs across all your Apple devices and auto-fills seamlessly. There’s genuinely no excuse for weak passwords in 2026.
7. Backup Strategies to Safeguard Your Data from Day One
Repeat after me: if it’s not backed up, it doesn’t exist. Hardware can be replaced. Your daughter’s first steps video? Your wedding photos? Your years of notes and messages? Those are irreplaceable. Set up your backup strategy on day one and never think about it again.
iCloud Backup
The easiest option. Go to Settings > [Your Name] > iCloud > iCloud Backup and toggle it on. Your iPhone will automatically back up every night when it’s connected to Wi-Fi and charging. The free tier gives you 5GB, which isn’t enough for most people. I strongly recommend upgrading to at least the 200GB iCloud+ plan — it’s a few dollars a month and covers your photos, app data, messages, and device settings.
Local Backup via Mac or PC
For an extra layer of security, connect your iPhone 17 to your computer and create an encrypted backup using Finder (Mac) or iTunes (Windows). Encrypted backups include your saved passwords, Health data, and Wi-Fi settings — things iCloud backup doesn’t always capture. Do this monthly at a minimum.
What Gets Backed Up (And What Doesn’t)
iCloud backups cover most of what matters: app data, device settings, home screen layout, messages, photos (if iCloud Photos is enabled), and ringtones. However, they don’t include content you can re-download (apps, music, movies) or data already synced to iCloud (contacts, calendars, notes). For a truly comprehensive backup, use both iCloud and a local encrypted backup.
8. AppleCare+ for iPhone 17 — Is It Worth the Investment?
This is the question everyone asks, and the answer depends on your lifestyle. Let me break it down so you can make an informed decision.
What AppleCare+ Covers
With AppleCare+, you get unlimited incidents of accidental damage repair for a small service fee (typically $29 for screen damage and $99 for other damage). You also get coverage for battery service if your battery drops below 80% capacity. Without AppleCare+, an out-of-warranty iPhone screen repair can run $300+, and a back glass repair can exceed $500.
AppleCare+ with Theft and Loss
For a higher monthly premium, you can add theft and loss coverage. Each incident costs a $149 deductible, and you get up to two incidents per year. Considering a new iPhone 17 costs over $1,000, the math works out in your favor if the worst happens even once.
Monthly vs. Upfront Payment
You can pay monthly or make a one-time upfront payment for two years. Monthly gives you flexibility — you can cancel anytime. Upfront is slightly cheaper overall. If you keep your phone for the full two-year cycle, the upfront option saves money. If you upgrade annually, monthly makes more sense.
Third-Party Alternatives
Companies like Asurion, SquareTrade, and carrier-specific plans (Verizon, AT&T, T-Mobile) offer competing insurance. They’re sometimes cheaper, but read the fine print carefully. Deductibles tend to be higher, claim processes can be slower, and you might receive a refurbished device instead of a genuine Apple repair. When weighing your options, it’s also worth understanding the DIY vs. professional iPhone repair debate. For most people, AppleCare+ offers the best peace of mind.
9. Must-Have iPhone 17 Accessories for Long-Term Protection
Beyond cases and screen protectors, a handful of accessories can significantly extend the life of your iPhone 17. Think of these as the supporting cast that keeps your device in top shape.
MagSafe Charger
Wireless charging isn’t just convenient, it’s protective. Every time you plug in a cable, you create wear on the charging port. Over two or three years, that adds up. If your port ever stops working, here’s a helpful iPhone charging port repair guide. A MagSafe charger eliminates that wear entirely and snaps perfectly into place every time. Apple’s official MagSafe charger or Belkin’s BoostCharge Pro are both excellent options.
Camera Lens Protector
The iPhone 17’s camera module protrudes slightly from the back, making it vulnerable when you set your phone down on flat surfaces. A camera lens protector, essentially a thin ring of tempered glass — adds protection without affecting photo quality. Brands like ESR and WSKEN make great options for under $15. If the lens does get damaged, our iPhone camera lens replacement guide explains the repair process.
Cleaning Kit
A microfiber cloth and some phone-safe cleaning solution go a long way. Avoid household cleaners, which can strip the oleophobic coating on your screen. Look for kits specifically designed for smartphones — they’re gentle on coatings while effective against fingerprints and grime.
Car Mount
If you use your phone for navigation, a MagSafe car mount is essential. It keeps your phone secure, visible, and off your lap. Look for mounts with soft rubber grips or padded cradles that won’t scratch your case. Avoid the cheap suction-cup models that fall off in the heat.
Portable Power Bank
A dead battery leads to risky charging decisions — borrowing strangers’ cables, using sketchy public USB ports (hello, juice jacking), or running your battery to zero repeatedly (which degrades long-term health). A compact power bank from Anker or Mophie keeps you topped off safely wherever you go.
10. Common Mistakes That Damage Your iPhone 17 (And How to Avoid Them)
Even the most careful iPhone owners make mistakes. Here are the most common ones I see — and how to sidestep them before they cost you.
Using Uncertified Chargers and Cables
That $3 gas station charging cable might work today, but it could fry your battery tomorrow. Cheap, uncertified accessories lack proper voltage regulation and overcurrent protection. Always use MFi-certified (Made for iPhone) cables and chargers. Your battery will thank you.
Ignoring Software Updates
I’ve heard every excuse. “I’ll update later.” “Updates slow my phone down.” “I don’t have time.” Look, Apple’s security patches exist because real vulnerabilities were discovered. Delaying an update means your phone is exposed to known threats. Just enable automatic updates and let your phone handle it overnight.
Overcharging Myths
Good news: you can’t “overcharge” a modern iPhone. The battery management system stops charging at 100% automatically. However, keeping your phone plugged in and at 100% all day, every day, does cause slightly faster battery degradation over time. The iPhone 17’s Optimized Battery Charging feature helps by learning your schedule and waiting to charge past 80% until you need it. Make sure it’s enabled. And if your battery health does eventually decline, our iPhone battery replacement guide has you covered.
Carrying Your Phone Loose
Tossing your iPhone in a bag with keys, coins, pens, and who knows what else is a recipe for scratches and screen damage. Use a dedicated pocket in your bag, or invest in a small protective pouch. It sounds old-school, but it works.
Skipping Backups
This one hurts because by the time you realize you needed a backup, it’s too late. I’ve seen people lose thousands of photos and years of messages because they never set up iCloud backup. It takes 60 seconds. Do it now. Seriously, go do it. I’ll wait.
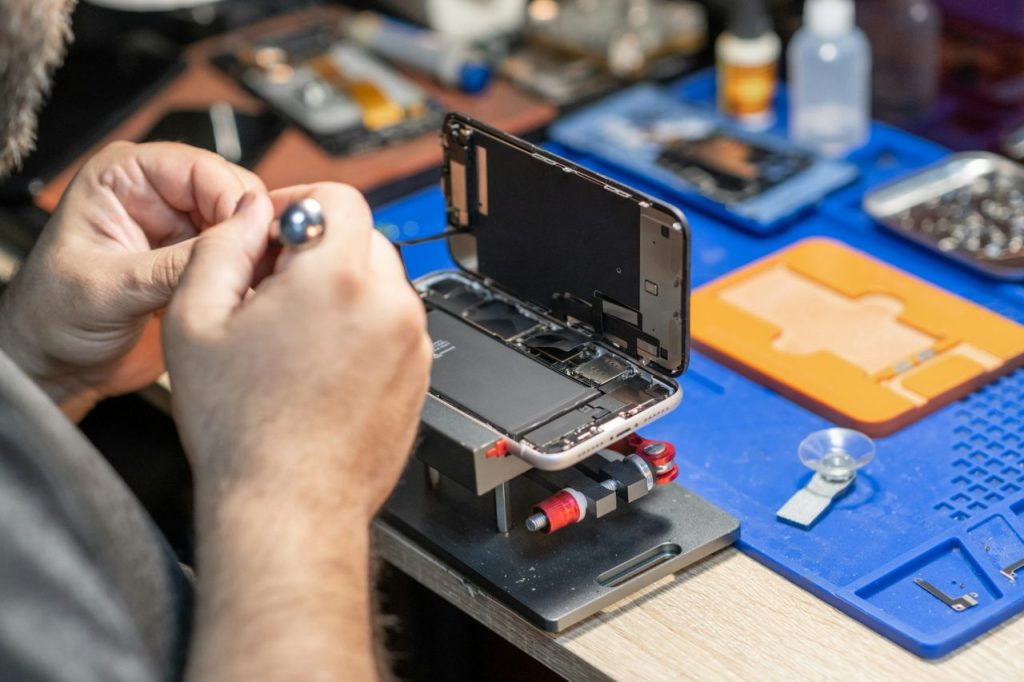
Attempting Repairs Without Proper Knowledge
If something does go wrong with your iPhone 17, resist the urge to crack it open yourself unless you really know what you’re doing. Our guide on the essential tools for iPhone repair at home can help you decide whether a DIY approach is right for your situation, or whether it’s better to leave it to the pros.
Conclusion: Protect Your iPhone 17.
And there you have it, a complete, no-stone-unturned roadmap for protecting your iPhone 17 from the very first moment you power it on. From choosing the right case and screen protector to locking down your privacy settings and building a bulletproof backup strategy, every small step you take on day one adds up to serious long-term protection.
Here’s the bottom line: your iPhone 17 is a significant investment, both financially and personally. The device holds your photos, your conversations, your financial information, and your memories. Treating it with a little extra care from the start means you’ll enjoy a device that looks and performs like new for years, and you’ll preserve its resale value if you decide to upgrade later.
Don’t wait until you see that first scratch or experience a data scare to take action. Spend 30 minutes today setting up your defenses. In the future, you will be grateful.